
Soooooo I have been doing some baking…. lots of baking. I noticed something about my baking habits, I much prefer chocolate over vanilla cupcakes, all day long. Over the weekend, I wanted to try something new. I am constantly looking for a new quick and easy vanilla cupcake. My first batch didn’t produce the results I was looking for,so i made another, and another.
The more and more baking I do, I learn that size, baking time and measuring batter is especially important. I wanted to give you an overview and comparison of some different sizes of cupcakes shown below.I am by no means an expert or trained professional, but I do a lot of baking, mostly cupcakes. I thought this was useful information for me to know and so I thought you might enjoy it as well.
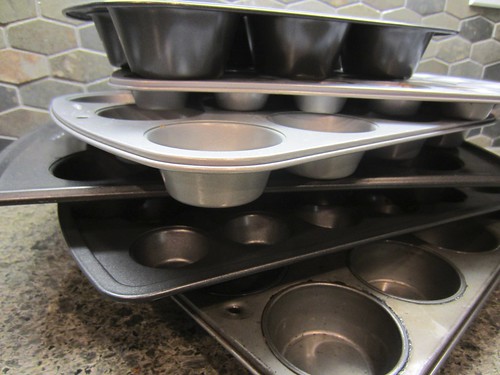
You might need some pans
First I started with my new jumbo cupcake pan. My dad used to make muffins in a jumbo pan; like seriously, he never made regular size muffins. It’s been awhile since I used one and I definitely needed some more work. I love the idea of a jumbo cupcake because I think of it like a mini cake. I wasn’t sure how much batter to use, so I did some testing.
Measuring batter isn’t the fastest method ever, but there is a rhyme and reason, so keep on reading! Below I refer to two types of pans. I use a Wilton dark non-stick pan and an aluminum pan, both are non stick but the surfaces vary.
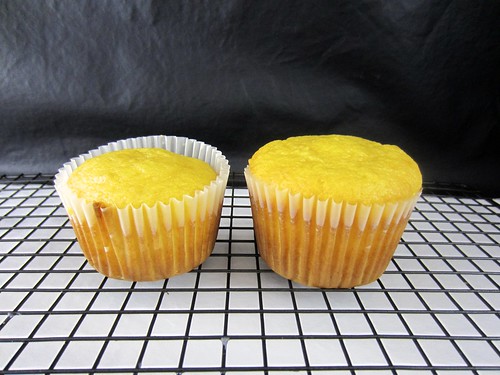
The below photo is comparing 1/3 C batter (left) vs 1/2 C batter (right) using a jumbo cupcakes liner. These were baked at 350°F. Everyone’s oven is different, so baking times will vary depending on your oven. The cupcake on the left was baked for 18 minutes and the cupcake on the right was baked for 20 minutes using a dark, non-stick pan. The I think the 1/2 C of batter is more up my alley. I like when the cupcake sits just above the liner.
I was also curious what would happen if I removed the liners. So I did the same test using 1/3 C of batter (left) and 1/2 C of batter (right), but this time I generously greased my pan using Crisco. The baking temperature and times remained the same. I determined that using a 1/2 C of batter was not conducive for the jumbo pan unless I used a liner. The cupcakes bake on the outer edge first, pushing the uncooked batter towards the center, this is what makes them rise into a dome. However, in this case, there is too much batter for it to bake evenly and rise nicely.

After completing this test, I much preferred the jumbo cupcakes using a liner. The liner acts as a buffer between the heat from the pan and batter; it keeps the edges from cooking too fast.
1/3 C batter with and without a liner

1/2 C batter with and without a liner
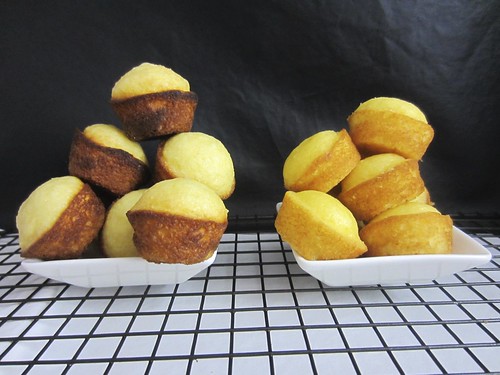
This is what I call a cupcake flop. You never know how your cupcakes are going to bake, and it is disappointing to pull them out of the oven looking like this. This shouldn’t go to waste though. Whenever I have a flop, I grab a ziplock bag and crumble the cake or cupcakes up to use for future cake pops or as topping. I keep it in the freezer for up to one month.

Mis-cakes
The next test I conducted was on the standard size cupcake pan. Most of the cupcakes I make use a standard size pan. I always measure my batter when I am making cupcakes. Different recipes call out for different baking times and temperatures. Most recipes that call for your liners to be 3/4 full, and bake for 18-20 minutes. I fill my liners 2/3 full, I hardly ever fill them more; and thus, I have to adjust my baking time to accommodate the reduced amount of batter. I usually bake them for 12-15 minutes.
I use my large scoop to measure my batter, which is approximately 3 tbsp. This will fill your liners about 2/3 full (left cupcake). If you prefer to fill to filler your liners 3/4 full, I found that 1/4 C of batter was the perfect amount.
The below cupcakes were baked at 350°F. The cupcake on the left was baked for 14 minutes and the cupcake on the right was baked for 17 minutes using an aluminum pan.
Although I prefer the appearance of the cupcake on the right (1/4 C batter), I find that it reduces the overall yield of your cupcakes. This can greatly increase costs if you are baking on a larger scale, which is why I usually only fill my liners 2/3 full.
Even if you measure the batter, it doesn’t mean the cupcakes will bake evenly. I usually have these problems on the last one or two liners I fill. I scrape the bowl to get every last bit of batter. I am not sure if it is too much oil, or batter that isn’t mixed enough, but occasionally, these couple of cupcakes don’t always turn out usable.
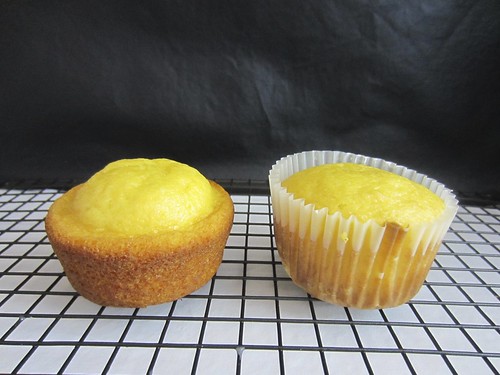
I did the same test with the standard size cupcake and baked them in a greased aluminum pan. The below cupcakes are baked using 1/4 C batter for 17 minutes. The shape of each cupcake was slightly different. I think I will stick to liner-less baking for muffins only.

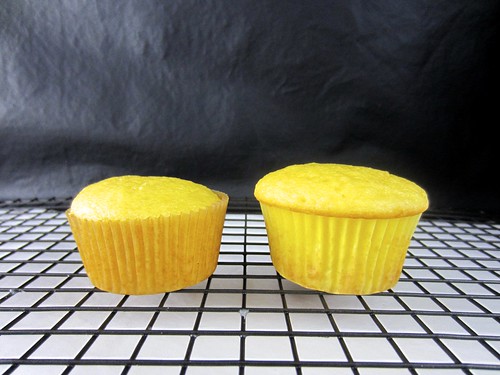
If you enjoy baking as much as I do, I am sure you have a variety on pans in your house. Cookie sheets and cupcake pans are similar in that a dark non-stick pans are great because they are easy to clean, but it doesn’t always enhance the food. Dark non-stick pans will produce a crispy surface on any area it cooks against. Whether it is the bottom of a cookie or the edges of your cupcake, they will bake up darker and slightly crispier than an aluminum pan. The cupcake on the left was baked using a dark non-stick pan and the cupcake on the right using an aluminum pan with a 1/4 C of batter in each. I did notice that in most cases, the dark-non stick pan helped the cupcake to rise slightly higher than the aluminum pan.
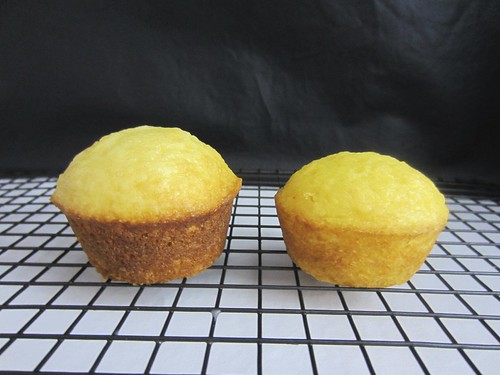
Dark non-stick vs. aluminum pan
I conducted the same test using my mini cupcake pan. I love my mini pan because bite sized cupcakes are so in-your- mouth poppable and adorable. For my mini cupcakes, I use my smallest scoop, which is approximately 1 tbsp of batter. These were baked at 350°F for 9 minutes. Similar results were true with the minis. The dark non-stick pan (left) baked up darker around the edges, but the cupcakes rose slightly higher than the ones on the right, which were baked in an aluminum pan.
I crush on mini cupcakes
Lastly, I wanted to show you a comparison of the 3 sizes of cupcakes. The batter measures are as follows: mini cupcake 1 tbsp, standard size cupcake 1/4 C and jumbo cupcakes with 1/2 C of batter.


My last piece of advise is to invest in some quality bakewear, especially if you plan to do a lot of baking. Most of my cupcake pans are from Wilton, and I have no complaints thus far.
I am interested in hearing from you. Was this post helpful? Do you have additional questions? Please leave me a comment below. Do you have similar findings when you bake?
Happy baking!

This experiment is super interesting.
Thanks Jocelyn!
Pingback: Poppable Cake Batter Bites | BeyondFrosting
Pingback: Chocolate Guinness Stout Cupcakes with Maple Cream Cheese and Bacon (Man-cakes) | BeyondFrosting
Very helpful!! Thanks
Thank you thank you…
You are very welcome!
Thankz…I found This Very Helpful.I Have To Make 120 Cupcakes For My Moms Remarriage In September (jumbo Size) Any Advise On Freezing Them If I Wanted To Make Them In Advance?
Hi Tahirah, Thanks for stopping by. When I used to work at the bakery, we would put the cakes in a bakery box and wrap them twice with heavy duty saran wrap. However, my best advice would be to try it with a test batch and see how it effect the cupcake after freezing. Make sure your cupcake are completely cooled before freezing. Good luck with the wedding!
This is a brilliant piece, exactly what I was looking for! Thanks f
Yeah! So happy to help!
Pingback: Simple Cooking: Straight Up Rhubarb Bars – Chicagoist | abejarg16
super useful post! was wondering if my wilton dark non-stick cupcake pans were not a good thing. your post shows they are very good pans. thank you for testing and writing about it.
Hi there! I think it totally depends on how you want to cook. I prefer to bake with my dark non-stick pans because I think it helps my cupcakes rise taller. But when I am baking without liners, I prefer a lighter pan. I am a fan of the Wilton products!